A router is a versatile woodworking tool that is used to create a wide range of designs and shapes in wood. With a router, you can create intricate patterns and shapes that would be difficult or impossible to achieve with other tools. A router is a powerful tool that can be used to create beautiful and professional-looking projects, and it is an essential tool for any woodworker. In this blog post, we will explore beautiful carving designs in wood with a router.
We will cover safety precautions, selecting the right router bit, setting the router depth, marking out the design on the wood, and different carving techniques, such as straight and curved cuts, making corners and angles, and creating textures and patterns.
Preparing to Use a Router:
Before using a router, it is important to take safety precautions to protect yourself and the wood you are working with. Always wear eye and ear protection, and make sure the router is unplugged before making any adjustments or changing the router bit.
Choosing the right router bit is crucial for achieving the desired design and finish. There are many different types of router bits available, each with its own specific use. For example, a straight bit is best for making straight cuts, while a round-over bit is best for creating rounded edges. Research and experiment with different router bits to find the one that is best suited for your project.
Setting the router depth is also important to ensure the design is carved to the desired depth. The router depth should be set to the thickness of the wood you are working with, and it should be adjusted as necessary throughout the project.
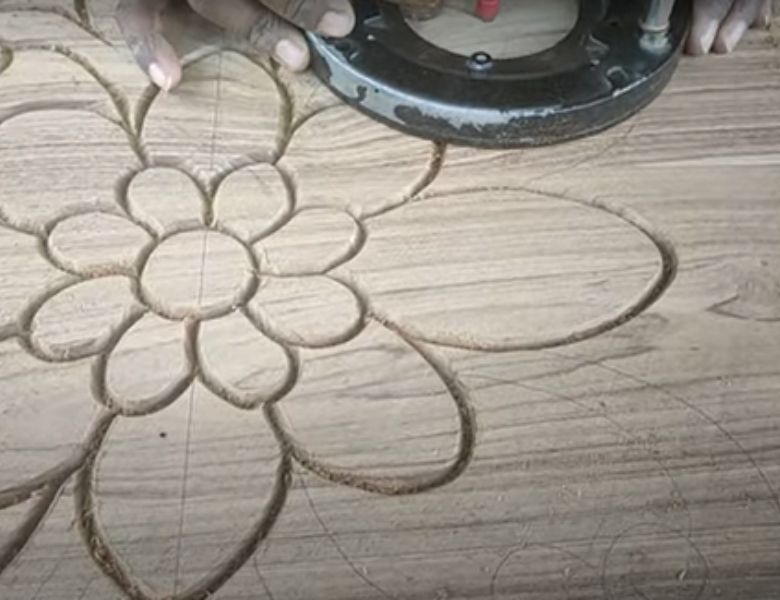
Marking out the design on the wood is another important step in preparing to use a router. This can be done using a pencil, marker, or scribe. It is essential to have a clear and precise guide to follow while carving the design.
By taking these preparatory steps, you can ensure that your router is set up correctly, the right bit is selected, and the design is marked out correctly, which will lead to a smoother and more accurate carving process, and a better final result.
See Also: Wood Router Tips and Tricks
Carving Techniques:
Straight cuts are one of the most basic and versatile techniques when using a router. To make a straight cut, you simply need to guide the router along the marked-out line, making sure to keep the router base flat against the wood. This technique is commonly used for creating edges, borders, and grooves.
Curved cuts can add a unique and elegant touch to your project and can be achieved by using a curved bit, such as a round-over or a cove bit. To make a curved cut, guide the router along the marked-out line, keeping the router base flat against the wood and following the curve of the line.
Making corners and angles can be tricky, but with a little practice, you’ll be able to achieve a smooth and precise cut. One way to make corners is to make a series of straight cuts and then use a chamfer bit to smooth out the edges. For angles, use a combination bit that has a straight and a bevel edge, and adjust the angle on the router base plate.
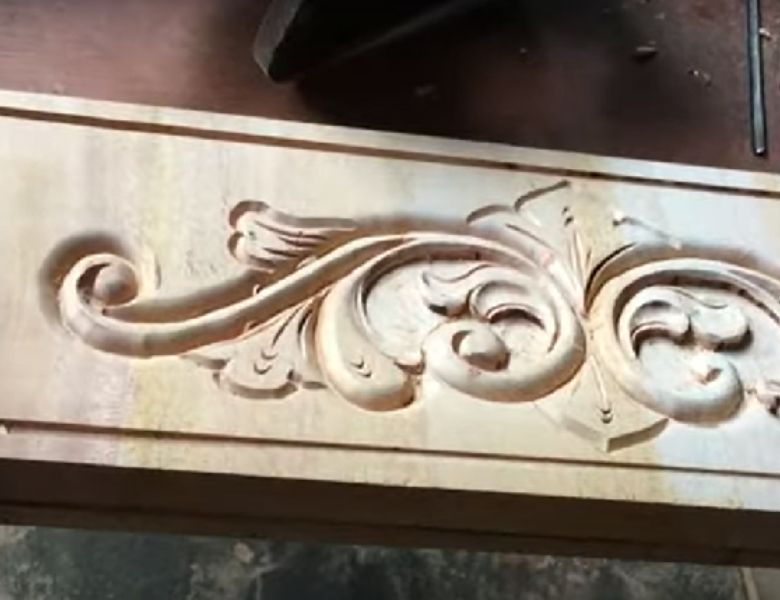
Creating textures and patterns is another way to add interest and depth to your projects. This can be achieved by using specialized router bits, such as a texturing or engraving bit. Experiment with different textures and patterns to find the one that best suits your project.
By mastering these carving techniques, you will be able to create a wide range of designs and shapes in your woodworking projects, and take your router skills to the next level. Remember to practice and take your time when learning new techniques, and always work with safety in mind.
Finishing Touches:
After the design is carved into the wood, it’s time to give it a final touch. Sanding and smoothing the wood is the first step in this process. This will remove any rough edges or debris left behind by the router and will ensure a smooth surface. Start with a coarse grit sandpaper and work your way up to a finer grit.
Applying a finish (stain, paint, etc.) can enhance the natural beauty of the wood and protect it from wear and tear. It’s best to test the finish on a small area before applying it to the entire piece to make sure you are happy with the color and finish. If you decide to paint or stain your piece, make sure to allow enough drying time before moving on to the next step.
Troubleshooting common issues is an important step to ensure that the final product is of high quality. For example, if the router is not set to the correct depth, the design may not be carved deeply enough. If the router bit is dull, it may leave a rough surface. If the wood is not clamped securely, the design may not be precise. By identifying and correcting these issues early on, you can save time and materials, and ensure that your final product is of the highest quality.
Finishing touches are the final step in the router woodworking process. By sanding, smoothing and applying a finish, you can enhance the natural beauty of the wood and give your project a professional and polished look. By troubleshooting common issues, you can ensure that your final product is of the highest quality. Remember to take your time, work carefully and enjoy the process, to create a piece that you’ll be proud of.
See Also: How To Make A Dovetail Jig For Router Table?
Can you carve wood with a router?
Yes, a router can be used to carve wood. Routers are versatile tools that can be used to create a variety of shapes and designs in wood, including decorative edges, grooves, and even detailed carvings. However, it is important to use the proper router bit and to work slowly and carefully to avoid damaging the wood or the tool.
How do you use a router to design wood?
To use a router to design wood, you will need to choose the appropriate router bit for the design, set the depth of cut, and adjust the speed setting. Then, use a straight edge or template as a guide and slowly guide the router along the wood, following the design. It’s important to work slowly and carefully to avoid damaging the wood or the tool. Remember to use proper safety equipment such as goggles and dust masks.
What is the best router for wood carving?
The best router for wood carving would be one that is powerful, easy to control, and has a variety of speed settings. A fixed-base router or a plunge router with a variable speed option would be a good choice, as it will allow you to adjust the speed of the router bit to match the type of wood you are working with and the complexity of the design. Brands such as Bosch, DeWalt, Makita, and Triton are known for producing high-quality routers that are suitable for wood carving. It’s important to choose a router with a powerful motor, as it will make it easier to control the tool and achieve precise results.
Can you freehand with a router?
Yes, it is possible to freehand with a router, but it requires skill and practice. Freehand routing means guiding the router without the use of a straight edge or template, relying on the user’s hand stability and control to guide the tool along the desired path. Freehand routing is often used for more intricate designs and detailed carving, but it can be challenging and requires more practice to get it right. It’s important to note that freehand routing can be dangerous as it can be difficult to maintain control of the tool, and it’s recommended to use safety equipment such as goggles, dust masks, and ear protection.
How do you carve calligraphy on wood?
To carve calligraphy on wood, you will need a few tools such as a router, a calligraphy router bit, a steady hand, and some patience. Here are some steps to follow:
- Choose the appropriate type of wood for your project, hardwood is recommended as it is more stable and less likely to chip or splinter.
- Draw or print the calligraphy design on the wood using a pencil or pen.
- Secure the wood to a work surface to keep it stable while carving.
- Install a calligraphy router bit in the router and adjust the bit to the appropriate depth.
- Start the router and carefully guide it along the lines of your calligraphy design, following the lines as closely as possible.
- Work slowly and carefully, making sure to keep a steady hand.
- Once you’ve finished carving, you can use sandpaper to smooth out any rough edges.
It’s important to practice on scrap wood before attempting to carve on your final piece and to use proper safety equipment such as goggles, dust masks, and ear protection.
Conclusion:
In conclusion, routers are powerful and versatile tools that can be used to create a wide range of designs and shapes in wood. By following the proper safety precautions, choosing the right router bit, setting the router depth, and marking out the design on the wood, you can ensure that your router is set up correctly and that the design is carved to the desired depth.
By mastering different carving techniques such as straight and curved cuts, making corners and angles, and creating textures and patterns, you can create unique and beautiful designs in your woodworking projects. Sanding, smoothing, and applying a finish can enhance the natural beauty of the wood and give your project a professional and polished look. Troubleshooting common issues can ensure that your final product is of the highest quality.
We hope this blog post has been helpful in giving you an overview of how to carve designs in wood with a router. Remember that woodworking is a skill that takes time and practice to master, so be patient and enjoy the process. There are many resources available online to help you learn more about router techniques and projects, so don’t hesitate to explore them. Happy woodworking!